- Knowledge Base
- General
- Power BI Basics: Importing and Transforming Data (Part 2)

Article sections
| Summary: | This series is to guide you through Getting Started with Power BI. The purpose of this series is to provide a quick overview so you can direct resources and plan the introduction of Power BI to your company. – September 2018. This is Part 2 – Power BI Basics: Importing and Transforming Data |
| Article Type: | How To |
| Related Product(s): | This article relates to the following products:
|
| Related Articles: |
Power BI Basics: Getting Started with Power BI
There are many “How To” videos on Power BI but sometimes a quick overview to guide you through Getting Started with Power BI. Once the outline of the whole process has been understood (without detail at every stage) it is then possible to plan how your business should approach Power BI and which personnel should be involved at which stage. The purpose of this series is to provide that quick overview so you can direct resources and plan the introduction of Power BI to your company. This is Part 2 – Power BI Basics: Importing and Transforming Data.
This Getting Started with Power BI series covers the following topics:
- Power BI tools & Licensing overview
- Importing and Transforming data
- Power BI Data Modelling
- Creating Visualizations
- Publish Docs to Power BI Service
Power BI Basics: Importing and Transforming Data
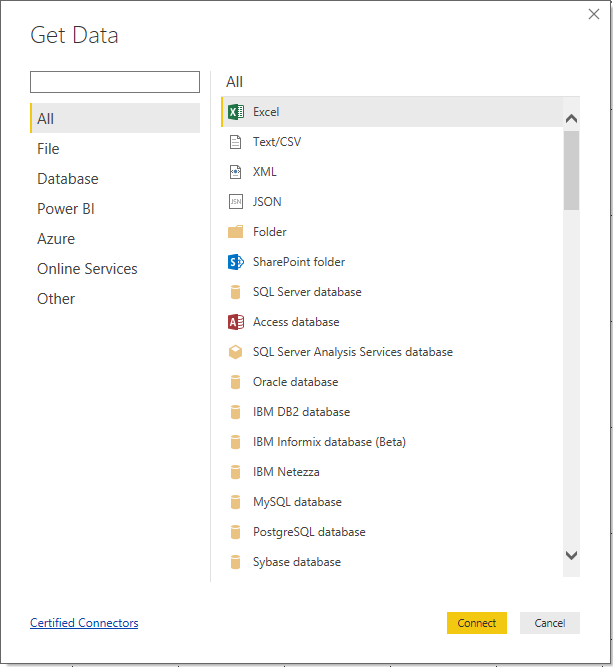
The first step when developing a Power BI report using Power BI Desktop is to connect to some data and import it into your file. The file extension for a document created using Power BI Desktop is “.pbix”. It is possible to connect to a vast array of data sources both locally and online.
A wizard will step you through the essential connection information relevant for the source type you select.
With Power BI Desktop it is possible to manipulate the data for the required analysis. Some of this manipulation happens at the import stage (which we are outlining here) and some can be carried out on the data, post-import, for charting purposes. The transforming during the import process uses the language M (aka M Query). Examples of basic transformations are:
- Data type changes
- Filtering (rows and/or fields)
- Conditional Columns creation
- Splitting columns
- Renaming/reformatting
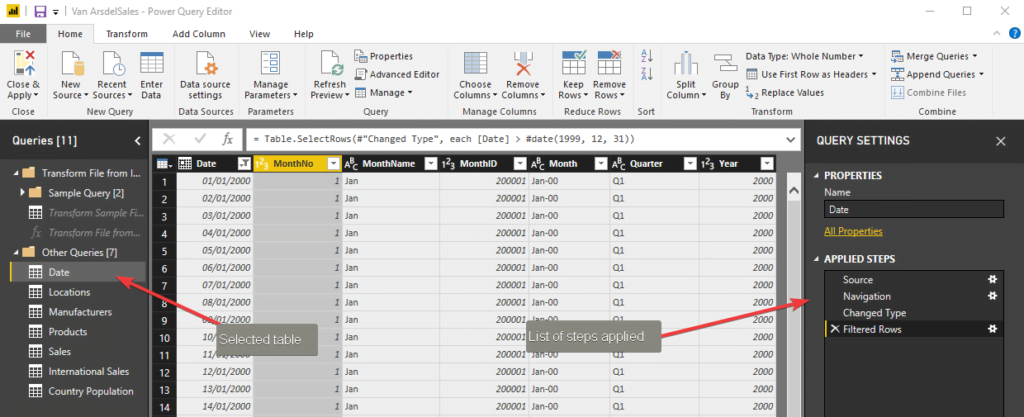
The menus available within Power Query Editor cover these and other basic transformations (under the Transform section).
As transformations are applied to a table, a record of the action is recorded so that it can be reviewed/amended/removed later if necessary. The screenshot below shows how this record of actions to be applied is listed.
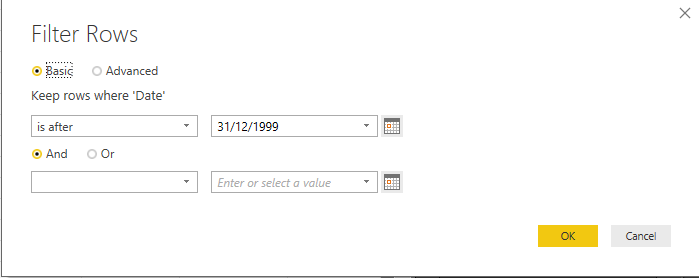
To edit a step select the cog (to the right-hand side of the step name) is selected. Example of step edit pane below.
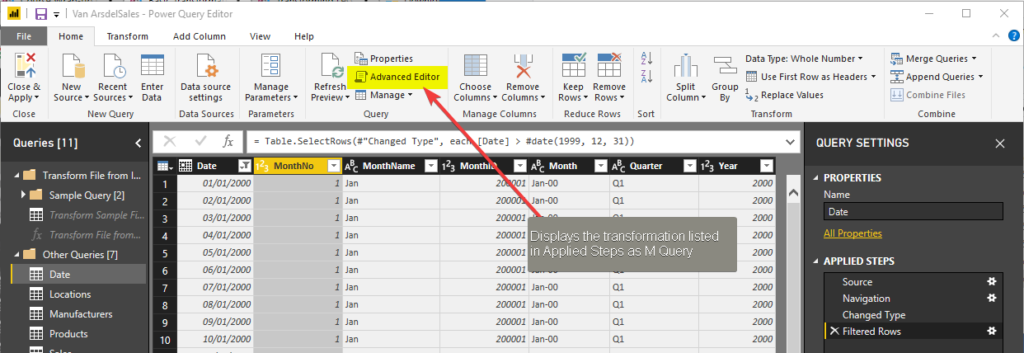
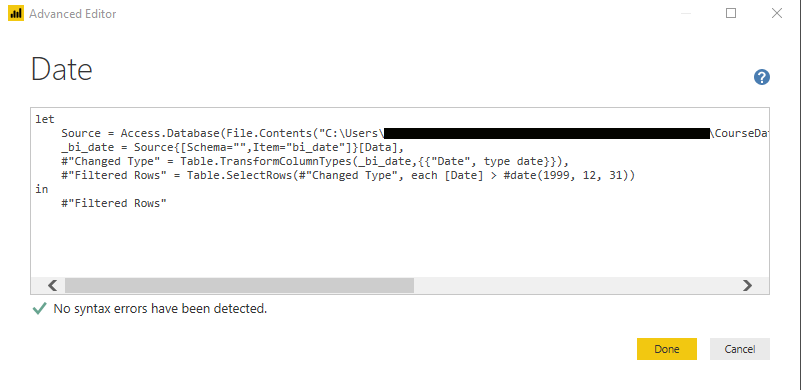
In some instances, a cog is not visible. This means that if a change is required it is necessary to go to the Advanced Editor.
Below is a view of the Advanced Editor pane where an understanding of M Query is required.
The screenshot above shows the area in which more advanced transformations can be written. Information on M Query syntax can be found here. The menu options do provide for many manipulations, so it is not always necessary to go into the Advanced Editor pane.
Read the next article (Part 3) in this Getting Started with Power BI series: Data Modelling
Related Articles
- How does Power BI Licensing work?
- Understanding Date Fields in the Dataverse
- Power BI URL Filtering
- Create Custom Reusable Controls in PowerApps
- Microsoft Flow FAQ
- Creating Microsoft Dynamics 365 Workflows Tips
- How to: Creating a "Run Once" Daily Trigger using Power Automate
- How-to: Microsoft Dynamics 365 System Backups
- How to check your Microsoft storage use
- Modifying Silently in Dynamics 365
